|
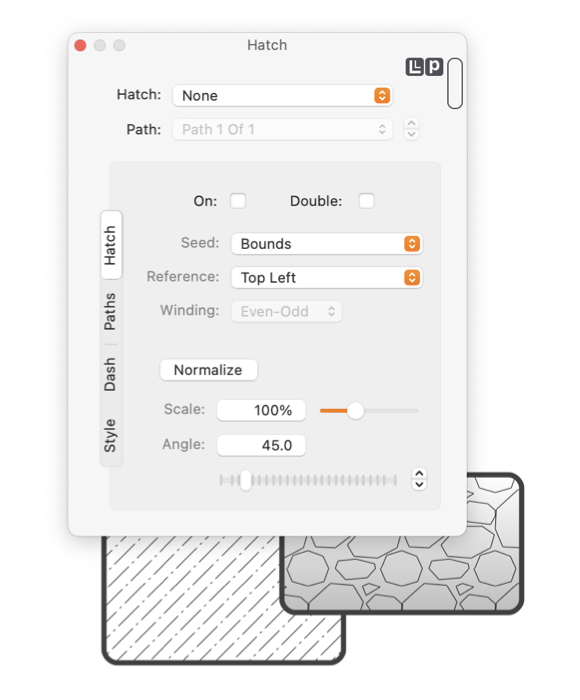
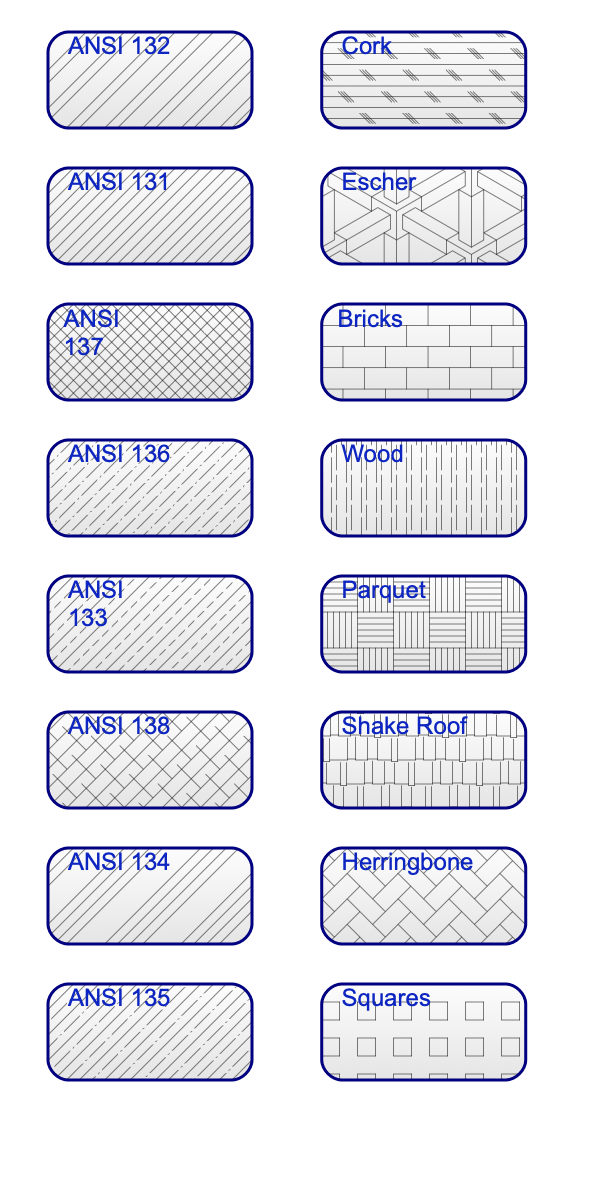
The popup menu at the top of the palette (Hatch popup) provides access to named vector Hatches. EazyDraw ships with several standard hatch designs, select from this list to use a hatch from this list. The menu has "save" and "remove" items (found at the bottom), use these to save new or modified hatch designs for future use. If the drawing is saved, closed and re-opened with the Hatch turned off, the hatch design is lost.
The Path popup menu indicates how many individual paths (lines, possibly dashed) are used to construct the Hatch. This menu does not have relevence for this (the Hatch) tab, it is used when working with individual paths on the Paths, Dash, or Style tab.
The On check box is the master control that triggers use of the Hatch with a graphic. When checked the hatch fill is drawn for the target graphic(s). When unchecked, no hatch is drawn; in this state the non-visible Hatch is still stored with the graphic and available for usage as designed.
The Double checkbox, when checked, will cause the Hatch to be drawn a second time at 90 degree orientation relative to the specified hatch. An example is the second hatch of the 3 shown below.
Seed: This specifies the reference location for the repeating sequence of lines. The choice "Bounds" will tie the hatch to the graphic, as the graphic is moved the Hatch will remain stationary relative to the graphic. The choices "Drawing" and "Page" ties the repeating sequence to a stationary point, in this case when the graphic is moved the hatch will appear to slide under the graphic. The latter two settings are useful when several graphics employ the same hatch and a continuous (across the drawing or page) Hatch appearance is needed.
Reference: This setting works with the Seed setting to define the actual "zero" reference position of the Hatch. The best way to understand this setting is to experiment with different settings while resizing a rectangle. You will see that this defines an anchor point for the hatch sequence.
The winding rule (that is the verb wind as in winding a clock) determines where fill is applied for complex shapes that have multiple enclosed area and internal islands. The
definition
and usage is the same as defined for Color and Style. This additional setting allows one to have a different winding rule for a hatch and than for other fills such as a solid color.
The Scale and Angle settings for the complete Hatch are used in conjunction with angle and shift settings for individual paths. The Normalize button will apply the primary scale and angle to the individual paths and reset the primaries to 100 percent and zero degrees.
The Scale and Angle settings are applied to each path and each path's Angle and Shift settings. This allows one to easily rotate the full Hatch design, or change the overall repeating size aspect of the entire Hatch.
|


