

|
Abstract Fill |

|

|
|
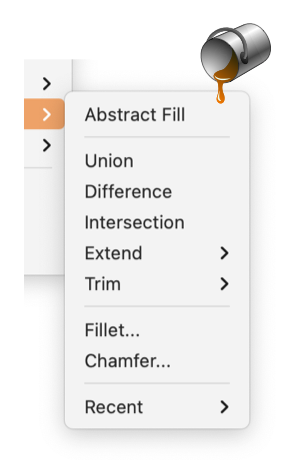
This menu command will create a new "concrete" graphic exactly matching an interior area defined only conceptually by other paths and shapes. A solid Fill color is applied to the new graphic. This fill can easily be changed to a pattern or gradient. The function of this command is to automatically generate the well defined graphic shape from the abstract shape informally defined by several shapes, paths, or curves. The "Paint Bucket" tool is a common tool found in pixel painting applications. It is used to flood an area defined by a solid pixel border with color. The tool is needed to facilitate coloring areas of a pixel-painted drawing. Vector drawing has this filling capability precisely defined for each vector shape, solid color, patterns or gradients are used to fill the interior defined by a graphic. An example of a "conceptually" defined shape is a triangle created from 3 intersecting lines. In terms of the vector graphics computer drawing medium, these are not a triangle - they are 3 un-related lines. For vector drawing the triangle (or a similar) tool is used to draw a single shape with three sides that form the triangle. These vector drawing concepts are not here "changed" - the Abstract Fill command will simply attempt to assemble and draw the triangle from the conceptual arrangement of the three lines. The Abstract Fill menu command is found on the Combine Submenu - on the Tools main menu, about 2/3rds of the way down. There is a Toolbar tool for the this command, the icon is the "Paint Bucket" icon shown to the left. To add this tool to the drawing window toolbar use the Customize command found on the View main menu.

The new filled shape is inserted behind all other graphics. This is the appropriate logic as the finite line widths of the defining border will normally show above the fill area, obscuring one half of the associated line-width's dimension. This means that if one clicks on an area that already has solid fill - nothing will be seen on the drawing as the new shape will be obscured by the exiting fill. Caution should be used to avoid introduction of spurious hidden graphic elements. The generation of the new filled shape is based on heuristic algorithms; the solution is derived by trial and error and rules that are loosely defined. These algorithms will work best when the area of interest is expanded to reasonably fill the viewing area of the screen. The user is expected to cooperate in the success of the algorithms. Flood Fill algorithms are trivial when dealing with defined pixels. The solutions are much more complex if a precise vector shape is the goal. EazyDraw does not use a pixel-hybrid implementation. The actual Bezier paths are analyzed, meeting end points and intersections are defined mathematically, then by recursion a continuous exact Bezier path is stitched together to form a closed outline of the new shape. The result matches the defining original shapes to the precision limits (32 bits at this writing) of the computing system. If the algorithm fails (nothing happens), adjust the zoom and or position of the target conceptual shape on the drawing view (the computer screen). The algorithms are designed to fail quickly and gracefully rather hang the system. On macOS 10.5 and newer the analysis of the scene is performed on a separate thread (utilizing other available CPUs) while the user is choosing the click point. On older PowerPC's and macOS 10.4 the computations do not begin until the final "click" and may take noticeable time, but on newer multi-core Intel machines all should be instantaneous. This command does not work with images (bitmaps, photos, ...) except to respect their edges as containing boundaries. The Clear Color command performs a somewhat similar action on bitmap images, a flood fill for an image's solid background color is cleared with the Clear Color command. Text boxes and image borders are used as defining borders. In the case of a text box this boundary may form an invisible (if there is no outline drawn for the text box) conceptual border for the fill. The actual lines of text are not used as the blocking boundary for the flood-fill, the defined text rectangle is used. |