

|
|
|
|
|
|
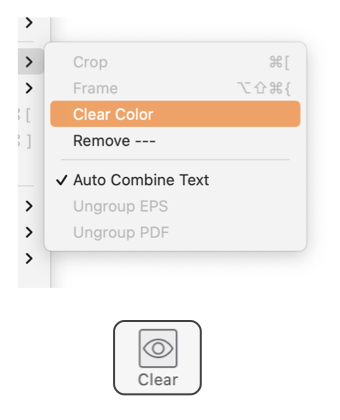
Clear Color - or Remove Background (Instant Alpha) This command is used to remove a background color from a bitmap image such as a JPG or TIFF. Use this to remove a solid color (or region of similar colors) and replace it with a clear transparent region. Often used to remove a background of a photo to allow placing the subjects of the photo before another background. Similar to Crop (or Frame) but works at a dot-by-dot level. Images such as photos from a digital camera are stored as individual dots called pixels. Most graphics downloaded from the web are also bitmap graphics saved as a large array of small pixels. These images usually are composed of solid colors and solid colored borders. The Clear Color command is used to clear out regions of a relatively solid color and replace them with clear transparent uncolored pixels. A bitmap graphic must be the first selected graphic on the drawing otherwise this menu command will not enable. This action does not apply to vector graphics that you draw with EazyDraw. This command does not apply to pdf or EPS images, they are vector graphics too. This Clear Color command is accessed from the Format main menu, Images submenu. The Clear Color action is not available on any of the standard EazyDraw tool palettes. It is available as a customizable toolbar button, use Customize toolbar to add the tool-button to the toolbar at the top of the drawing window.
Often Clear Color will need to be used in conjunction with the Crop technique. Use Clear Color to remove content near the edges of the target subject of the scene, use Crop to quickly and precisely eliminate the rest of the photo. Many times a graphic downloaded from the web will have a solid white background that fills out a rectangular shape. The situation can be confusing when your drawing's background is white as well. When such a graphic is used in a drawing the solid white will obscure other parts of the drawing. This is a situation where Clear Color technique is needed to replace the solid white background with the transparent. This "Clear Color" command is sometimes historically named with a technical phrase "Instant Alpha", key here is understanding what is meant by "Alpha." Alpha is the algebraic symbol used by computer scientists to represent the transparency (or opacity) component of a color. To make a solid color transparent EazyDraw sets the alpha component of the color of the individual pixel to zero - hence the term Instant Alpha. If the initial down click of the process hits a small area of distinct color, say a single light colored leaf in a tree of dark leaves, the actual area cleared might be very small. In this situation increasing the radius of the indicator circle will not expand the cleared area. Conversely, clicking on a point in a large field of solid color may clear a very large area even if the indicator circle is very small. When the drawing file is saved, the original photo and a clearing mask are saved independently. This means that the original photo may be restored with the "Remove Clear Color" command, even after the drawing is saved and re-opened. In some cases white is not a good indicator for the cleared and non-transparent regions of an image. In these cases changing the background color background color for the drawing is useful. This is done on the Page Layout panel. |