

|
Knife Tool |

|
|
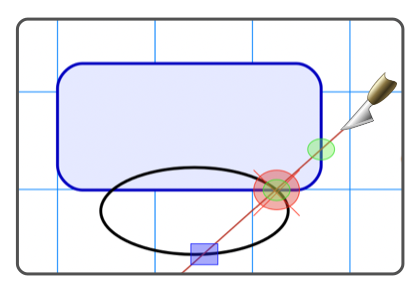
The Knife Tool is for trimming, cutting or removing vertices. It can be used to cut any graphic except a Text Area or an Image. The graphic does not need to be selected, the Knife Tool will act on any graphic in the top window of EazyDraw. Users often question "where is the eraser tool". Erasing is something that is possible in painting applications. With vector drawing applications graphics are constructions of lines and curves, not collections of colored pixels that can be removed in an erase like action. The lines and curves of a vector drawing are cut with the knife, after cutting the portion that needs to be erased is simply deleted. Visual feedback is provided so that you may be certain how the cutting action will effect your drawing. Undo works, in case the cutting effect turns out different than desired. The knife will NOT cut an image or inserted picture graphic - such as a JPG photo. Use the Crop feature to remove defined areas of a photo. Use the Clear Color capability to remove solid colors from various areas of an image. Both of these actions are accessed from the Images submenu on the Format main menu. The knife will trim two graphics with overlapping curves, exactly at the intersection of the curves.

Note that most times after the cut there is no visual change to the drawing. A line for example when cut still appears as the same line. The difference is only noticeable when you select the line and see the new end point handle at the cut point. Cutting intersecting graphics at an intersection may be used to trim ends at an intersection. The precise intersection cut is used in preparation for welding the remaining curve sections to form a new path. The Welded path may be formed using the Convert Menu or the Welded Group selection found on the Grouping submenu. Trim and Extend using the knife is a two step procedure and you need to remember the Control key modifier. The combined command of cut and trim is found on the Tools main menu, Combine menu on the Trim submenu. The definition of "close" for snapping to a vertex or an intersection is dynamic with respect to the degree of zoom for the drawing window. The distance is approximately the size of the control handles. If a cut needs to be made close to a vertex or intersection, zoom in, this will make the effective snap distance smaller and the cut point may be positioned more precisely - due to the higher zoom - and will not snap.In some cases a vertex may be located at just the place where a cut is needed. In some instances the vertex may be first removed, without much alteration of the path, then the actual cut made with a second use of the knife. If removing the vertex excessively alters the curve, try halving the number of vertices which is found on the Convert Menu . Cutting some graphics will change the actual graphic. For example cutting a circle will not only add the cut point, this action will transform the Circle to a Bezier Curve. You may view these side effects by using the Graphic Details Inspector . Cutting a cyclical wave form, will normally result in two new cyclical wave forms. For example cutting a sine wave will result in two new sine wave graphics. The tools for these wave form graphics are found near the bottom of the Math tool palette. There are exceptions to this rule. a) The discontinuous wave forms (Square Wave, Saw Tooth, and Pulse) will result in two new Bezier paths, the square wave functionality is lost with the cut. b) If a resulting wave form graphic will have less than 1/2 of a cycle, the resulting graphic form is reduced to a Bezier Curve. For example if a snippet at the end of a sine wave is trimmed - the main part of the curve will remain a sine wave but the snippet will be a Bezier curve. |