
EazyDraw Raw App For Help EazyDraw Registered Trademark, Dekorra Optics LLC EazyDraw Raw App For Help

EazyDraw Guides Layer
Related Information
Layers
Grid Menu
Grid Panel
Snapping
|

Guides (Guides Layer)

The Guides Layer checkbox enables use of user defined and place guides. These are implemented with a special layer, called the Guides layer.

Guides are created by dragging from a ruler onto the drawing. Several things happen behind the scenes that implement the guides, and one does not need worry about all the details. Simply dragging a guideline from a ruler onto a drawing is all that needs to be done for basic use of this feature.

Guides are used to provide automatic alignment of graphics to special horizontal and vertical lines placed on the drawing. Guides do not print. Graphic edges will snap to these guidelines.

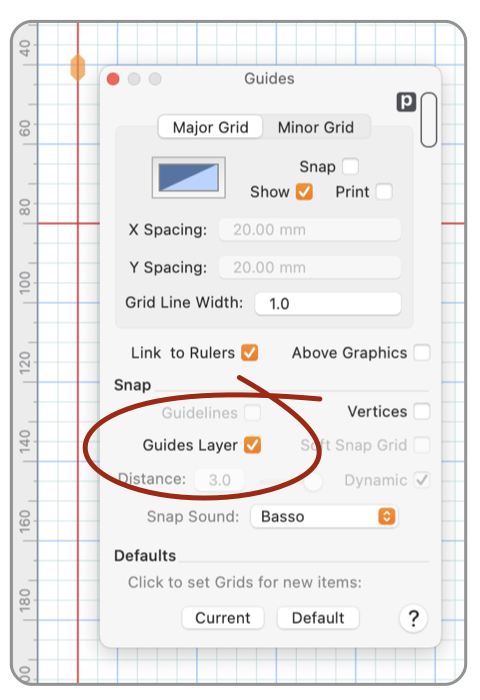
Guides are accessed on the Guide palette, found on the Grids and Guides submenu of the Format main menu.
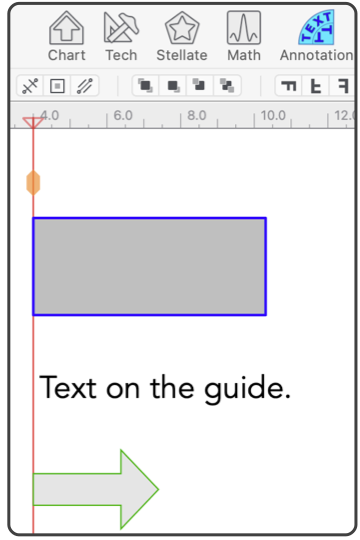
Guides are enabled or disabled using the checkbox shown circled. When enabled guides are shown on the drawing screen. These visible guide lines will snap graphic edges to provide aligned placement of graphics. The guides are drawn as thin red lines, horizontal and vertical.

When the Guides Layer checkbox is turned off, the guidelines are not shown on the screen and naturally they do not print, and they do not snap graphics in this state. The lines remain present on the Guides layer, so they may be re-instated with a simple check of the checkbox.

In all other respects the special Guides layer is a normal layer. The position, in-back-of or in-front-of other graphics and layers is managed in the normal fashion by changing the layer’s placement in the layer table.

A guide is added to the drawing by dragging perpendicular to a ruler, as the cursor leaves the ruler and enters the drawing a guideline is added. Position the line as desired by dragging the line. A guideline already on a drawing is moved by clicking on the guideline, near a ruler. This will select the guideline and then a click and drag is used to move the guideline. Guidelines do not select when clicked in the normal drawing area, only at the edge of the active drawing area - near the ruler.

When moving, guidelines snap to ruler tick marks. Use the stepper control found at the upper-left corner of the drawing area to adjust ruler tick marks to a desired spacing before moving a guideline. The Apple Command key is used to lift the tick mark snapping action, use this if it is desired to place the guideline at non-tick-mark positions.

The special Guides layer is shown in red on the Layers table. If it is made the Active layer , its special status is removed and the graphics on the Guides layer behave as normal graphics. Other lines and graphics may be added to the Guides layer in this manner. Any graphic on the Guides layer will act as a guide when the Guides Layer state is activated. This means that lines at angles other than horizontal or vertical may be installed as drawing guidelines.

Delete a guide by selecting as described above, then typing Delete key.

EazyDraw Help Pages example

When Guides Layer snapping is engaged, other forms of snapping are disengaged. Snapping to grids will not work while snapping to guidelines. Snapping Guidelines to normal graphics will not work while snapping to the Guides Layer.

Dragging a Guideline from a ruler will automatically set the Guides Layer snapping action, and override other snapping actions that may have been active. There is not need to first open the Guides palette and check the Guides Layer checkbox before dragging a guideline to the drawing.

Guidelines are automatically installed as thin red lines, but any color is allowed. Make the Guides layer the Active layer then select the lines and set line style and color in the normal fashion. Dashed lines are permissible as well and any color or weight.