

|
Drawing Tangent and Perpendicular |

|
|
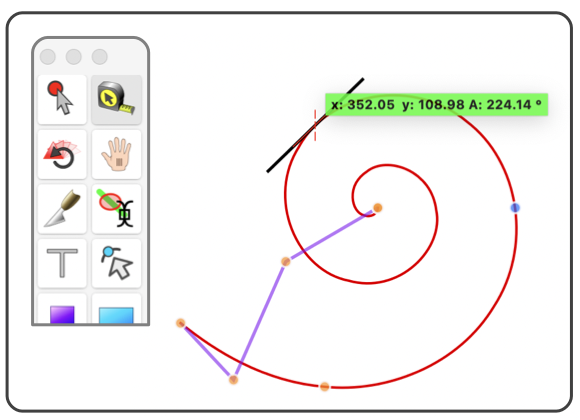
The "Measuring Tape Tool" will locate and indicate the slope of a curve. In this mode the tool provides a mechanism to add a line to the drawing that is tangent or perpendicular to the curve. The "Measuring Tape Tool" needs to be in use for these features to be available. There is another method for drawing tangents and perpendiculars. This is applied in conjunction with vertex snapping , accessed from the Format main menu - Grids and Guides submenu. Follow the above link to learn more about this method. It is used to draw a line "from" a defined point tangent to a curve. Where this technique described here is used to draw a tangent "to" a defined point on a curve. Graphics that are NOT selected are not specifically reported by the Tape Measure cursor. Select graphics of interest to enable automatic creation of these precision lines. The light green "point-angle" cursor read-out needs to be active for these actions to enable. Holding down the Apple-Command key while moving the cursor close to a curve will, in some cases, switch the cursor to this mode. For some shapes the cursor will need to be on one side or the other of the curve for this cursor to be the one displayed. The "Measuring Tape Tool" has the same behavior as the Arrow Tool with the addition of a live on-screen readout of the exact cursor position, key graphic parameters, or various distances.

The tangent and normal lines added are centered on the point of the tangent to the curve and they have Pinned angles and centers. If a line that originates precisely at this point is needed, drop both a tangent and normal. Then enable Snap Vertices . Next remove Center Pinning and leave Angles Pinned. Now each line may be adjusted and snapped at other line’s mid-point. This action will allow all possibilities of lines centered or originating at the point of tangency to the curve. One can trim the tangent and normal lines at their intersection, but this will also cut the curve. For this reason the above technique is more appropriate for generating lines that originate at the tangent point. You can use the keyboard to zoom in or out, just type "i" to zoom in and "o" to zoom out. The zoom action is centered on the mouse cursor location, if it is over the frontmost drawing window. It is centered on the center of the window if the mouse is off the screen. This means that by repeatedly typing "i" while positioning the cursor you may place the cursor as accurately as needed. This technique is also needed if another point of interest such as a vertex is close to the point where the tangent is needed, in this case the cursor may be reporting the position of interest and not the tangent angle, but by zooming in the interfering point may be avoided. When zoomed in, the lines added will be shorter in an absolute measurement. The can be edited in the normal manner to obtain the desired length and position. The lines are not locked to the originating curve, they are free to be moved anywhere on the drawing. Use the Lock feature if this needs be avoided. |