

|

|

|

|
|
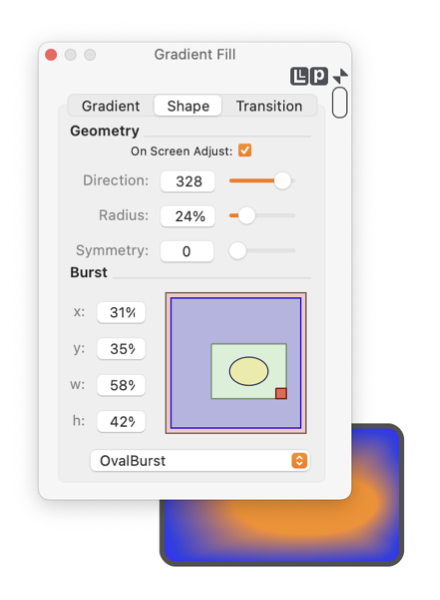
An interior shape can be used as a definition for "Burst" gradient fill. This effect fills the burst shape with the interior color then transitions out to the enclosing graphics bounding shape. There are 3 predefined burst shapes, rectangle, oval, and rounded corner rectangle. Any shape is used as the defining burst by dragging it from a drawing (EazyDraw drawing) to the burst view rectangle, shown circled on the figure to the left. All the user defined shapes are recorded with the EazyDraw application preferences. These are selected using the popup menu just below the burst view. Burst transitions are not possible for Bitmap gradients. Full vector gradient algorithms are required to implement a burst color transition. This palette is opened from the Tools main menu - Gradient Fill menu item. Navigate the palette with the three tabs: Gradient, Shape and Transition.

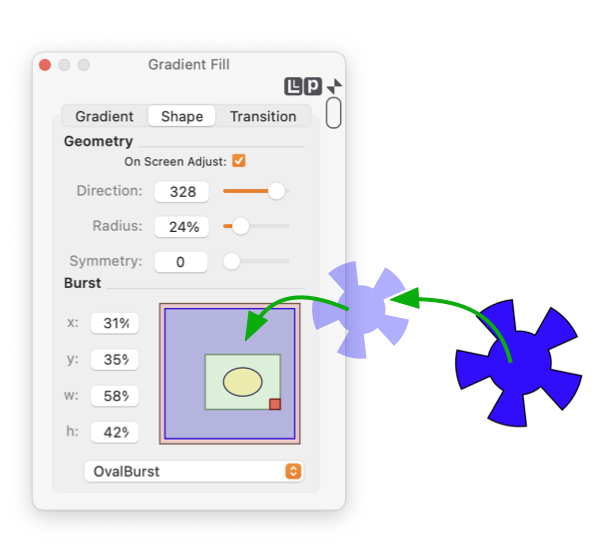
Defining new shapes is a powerful feature but can be a little confusing. The Gradient Fill panel will be looking for a gradient fill in the shape you are defining for use as a gradient fill. So after dropping the shape on the burst view nothing will change - it wouldn't make sense to automatically apply the new burst shape to the defining burst shape. Your next step is to select a different graphic - perhaps on a different drawing - and apply the newly defined burst to this host graphic using the popup menu. You must first drag a graphic off its drawing window before dragging over the burst shape area of the Gradient Fill panel. The simplest solution is to place the Gradient Fill palette away from (not over) the drawing window. You can also "flick" the drag image off the drawing and then over the palette - once this caveat is well understood. Interesting effects can be obtained by using the same shape for the burst and the host. In this case just drag the graphic to the burst view then select it as the burst. The self-burst effect may be rotated independent of the graphic using the symmetry gradient control. The effect does not rotate with rotation of the host graphic. The popup menu provides a selection for changing the name of any of the user defined shapes. The shape must be selected before it may be removed or renamed. One way to do this is to draw a temporary rectangle, define the gradient shape for this graphic then rename or remove the burst shape. Then remove the temporary graphic. The burst graphic may not be edited after being placed on the burst view. You can change the relative size and position as defined above. The orientation may be changed by use of the symmetry control found under the Geometry section of this palette, but all other editing must be completed before placement on the burst view. Color and style of the defining burst graphic are not used in the definition of the burst component, these are derived from the gradient fill colors defined. Normally a simple (i.e. - unlike a spiral) closed shape will be used for the definition of a burst. However, no restrictions are imposed on the defining shape. |