|
Cursor and Extended Cursor Configuration

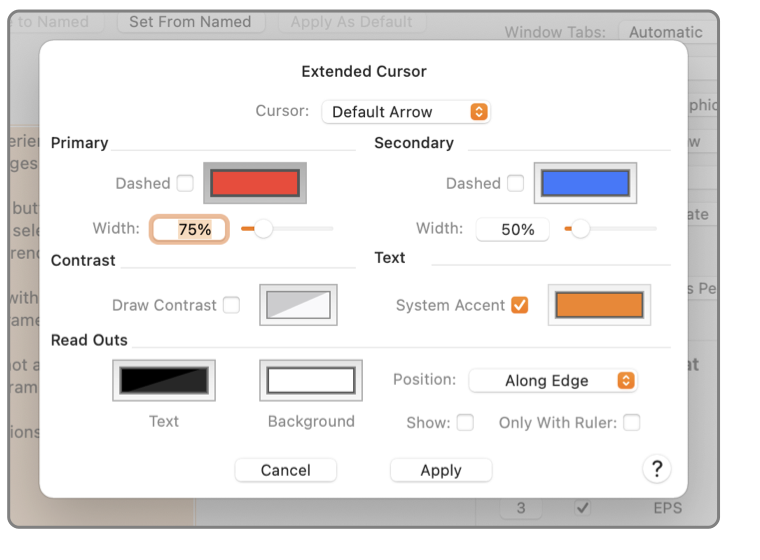
This panel is used to configure the appearance of the Extended Drawing Cursor. There are two basic cursor modes for EazyDraw. The first is the standard Apple / Mac simple Arrow Cursor, no frills - just an Arrow Cursor. The second mode provides an Extended cursor with several configurable options. This panel configures the options for this Extended Cursor mode.
The use of an Extended Cursor is selected on the Graphic Details Inspector, near the bottom of the contextual area. If "Nothing" is selected there then no additional information is provided with the cursor, the actual cursor (usually the "Arrow" cursor) will be the one provided by macOS and managed by your macOS system preferences settings. None of the parameters on this panel are used in this case. The parameters on this preferences panel apply for all the other Cursor selections (Full Screen, Ruler Edge, or To Ruler).
Extended Cursor selection is made on the
Graphic Details Inspector
Numeric Format area. Open the Graphic Details Inspector and deselect all graphics to access this selection.
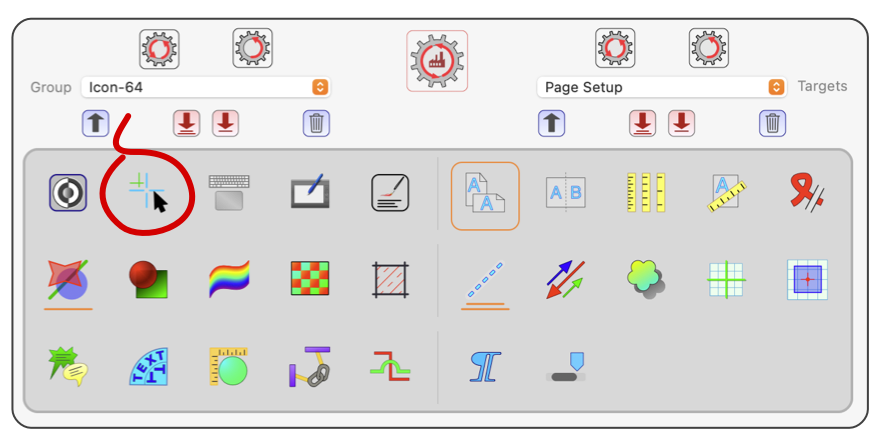
This preferences panel is accessed from the main EazyDraw Preferences panel, which is opened from the EazyDraw main menu. This panel manages the appearance of the Extended cursor -- when selected on the Graphic Details Inspector.
|
The actual Cursor used with any Extended Cursor is selected with the top Cursor selection. Selections here include the Default system Arrow and several others. To repeat for emphasis: The selection made here only applies if a selection other than "Nothing" is made for the Cursor setting on the Graphic Details Inspector. For example, to use a Reticle cursor one could select Reticle for the Cursor setting here and Ruler Edge for the setting on Graphic Details.
There are situations where multiple cursor reference lines are shown on the drawing. For example, when creating a rectangle reference indicators (guide lines) are shown at the initial and current corner of the rectangle. The Primary and Secondary headings apply to this multiple-cursor situations. The Primary settings apply to the main cursor, the one always in use. Secondary settings apply to other cursors that apply in certain situations. For example, the knife tool will have the primary cursor following your mouse movements and a secondary cursor will mark each of potentially several cut points. The parameters documented below apply to both Primary and Secondary usage.
The Color well sets the color for extended cursor lines or ruler markers. Any color is allowed, including ones with transparency.
The Dash checkbox allows use a dashed line for extended cursor lines.
The width parameter, entered in percent, is used to make the cursor line heavier or lighter. The actual width is derived from screen properties. The live appearance of the extended cursor reference lines will depend on the actual display screen. Use this parameter to increase (values over 100%) or decrease the weight or thickness of the cursor reference lines.
Contrast manages the use of a second color with extended cursor lines. Contrast is needed to keep a cursor graphic from "disappearing" when drawn over a region of the same. For example a black cursor will not show when used with a black drawing background. Normally a cursor is drawn with at least two colors to guard against disappearance. However in many typical drawing situations the "disappearance problem" is rare and not particularly problematic. On modern high resolution displays when anti-aliasing is in use, this contrast color will often "wash-out" the crispness of a thin reference line. For this reason you have an option to disable the use of a contrast color. Or manage the actual contrast color for your display and typical drawing situations.
When Extended Cursors are in use (something other than "Nothing" selected for Cursor on Graphic Details Inspector) numeric Read-Outs for the cursor position may be shown "live" on the drawing. The Read-Outs are shown in small text boxes, the Text and Background colors control the color for these text boxes. The Read-Outs may be positioned dynamically on the edge of the drawing - following cursor movement, or positioned statically in one of the 4 corners of the drawing. This selection is made with the Postion popup menu. Read-Outs may show all the time, or only when Rulers are present on the display. Use the two checkboxes to specify the desired behavior.
|

Formatting for the Read-Outs derives from the Numeric display settings, on Graphic Details. If more decimal places or perhaps fractional notation is needed make the selections on
Graphic Details Inspector
, Display settings.
The extended cursor selection only applies to EazyDraw drawing windows and specifically to the EazyDraw drawings where the extended cursor is the selection. The cursor chosen and the ancillary display information is not shown in other applications, or other documents of other applications or when the cursor is over the desktop.
Live numeric Read-Outs make slight but sometimes significant use of CPU resources. Drawing the extended cursor lines also add to the CPU load and screen update tasks. Neither of these activities benefit from additional CPU cores. The presentations and computations have been optimized but they still may impact CPU load on older or limited capability systems. In these situations some lag of cursor movement may be noticed and it may be necessary to revert to the non-extended cursor setting for complex drawings. The Numeric Read-Outs require the most CPU load, the extended cursors should not normally show noticeable impact on responsiveness.
|


